






How to Program a Chamberlain Garage Door Opener
How to Program a Chamberlain Garage Door Opener: A Step-by-Step Guide
Programming your Chamberlain garage door opener comes down to locating the colored Learn button on your motor unit and syncing your remote or keypad to it within a 30-second window. It is a quick task. Whether your remote stopped responding after a battery swap or your new keypad refuses to pair, you can fix this yourself in under ten minutes without calling a technician, provided your hardware is in working order. The key to getting it right on the first try is matching your remote to your opener’s specific Learn button color, since that color determines which security technology your system uses and which accessories are compatible with it.
Locating Your Chamberlain Learn Button
The Learn button is the pairing tool of your Chamberlain residential garage door opener. Think of it the way you’d think of the pairing button on a Bluetooth receiver: it puts the unit into a listening state so it can capture and store the unique radio signal from your remote or wireless keypad. Without pressing it, no amount of button-mashing on your remote will register. You must press it.
To find it, grab a sturdy ladder and head to the motor unit mounted on your garage ceiling. The Learn button sits on the back or side panel of the motor housing, typically tucked beneath or beside the light lens cover. On most units, there is a small LED indicator light directly next to it, and that light is your visual confirmation that the pairing process is active.
Chamberlain uses a color-coding system across its product line, with Learn button colors that include yellow, purple, orange or red, and green. Each color corresponds to a different manufacturing era and security technology generation. You do not need to memorize which color maps to which platform; you just need to look at the physical color of your button and verify that your remote or keypad is rated for that same system. Mismatched accessories are one of the most common reasons a pairing attempt fails, and it is an easy thing to overlook when buying a replacement remote online.
Before you press anything, clear the garage door’s travel path. Someone standing near the door during a programming sequence can get caught off guard when the door activates as part of the confirmation step. If your motor unit will not power on at all when you approach it, or if the LED indicator near the Learn button stays dark, you may be dealing with something beyond a simple pairing issue: common garage door problems like a tripped circuit breaker, a failed capacitor, or a damaged logic board can all present as an unresponsive opener.
How to Program Your Chamberlain Remote Control
The standard pairing sequence for a Chamberlain remote is simple, but the timing window is strict. Once you press the Learn button on the motor unit, you have roughly 30 seconds to complete the pairing action on your remote. Miss that window and the unit exits listening mode, meaning you will need to start over. Work quickly. This is not a design flaw; it is a deliberate security measure that prevents unauthorized devices from latching onto your system.
One thing worth knowing before you start: pressing and holding the Learn button for too long, generally more than a few seconds, will erase every remote, keypad, and smart device currently programmed to your opener. A firm press-and-release is all you need to open the pairing window. If you are also curious how a comparable system works, the process to program a LiftMaster garage door opener follows a nearly identical sequence, since both brands share parent-company technology and the same underlying security architecture.
- Press and Release the Learn Button: Press the colored Learn button on the motor unit once and release it immediately. The indicator light beside it will turn on, signaling that the system is ready to receive a new signal.
- Press Your Remote Button Within 30 Seconds: Within that 30-second window, press and hold the button on your handheld remote that you want to operate the door. Keep holding it until you get a confirmation signal from the opener.
- Watch for Confirmation: Release the remote button when the motor unit’s lights flash, or you hear two audible clicks. Either signal confirms the opener has successfully stored your remote’s code.
- Test the Operation: Press the programmed remote button one more time to verify the door opens or closes smoothly. If nothing happens, check the remote battery first, then repeat the sequence.
If you have followed these steps carefully and your remote still will not connect, the problem likely is not user error. A faulty receiver board, a worn-out logic board, or local radio frequency interference from nearby devices can all block a successful pairing. Don’t let garage door frustrations drag on: Denton Overhead Door offers fast, reliable garage door opener repair with same-day service and transparent pricing with no hidden fees. Call us today at 940-260-3351 to get your system working again.
Programming Chamberlain Remotes via the Wall Control Panel
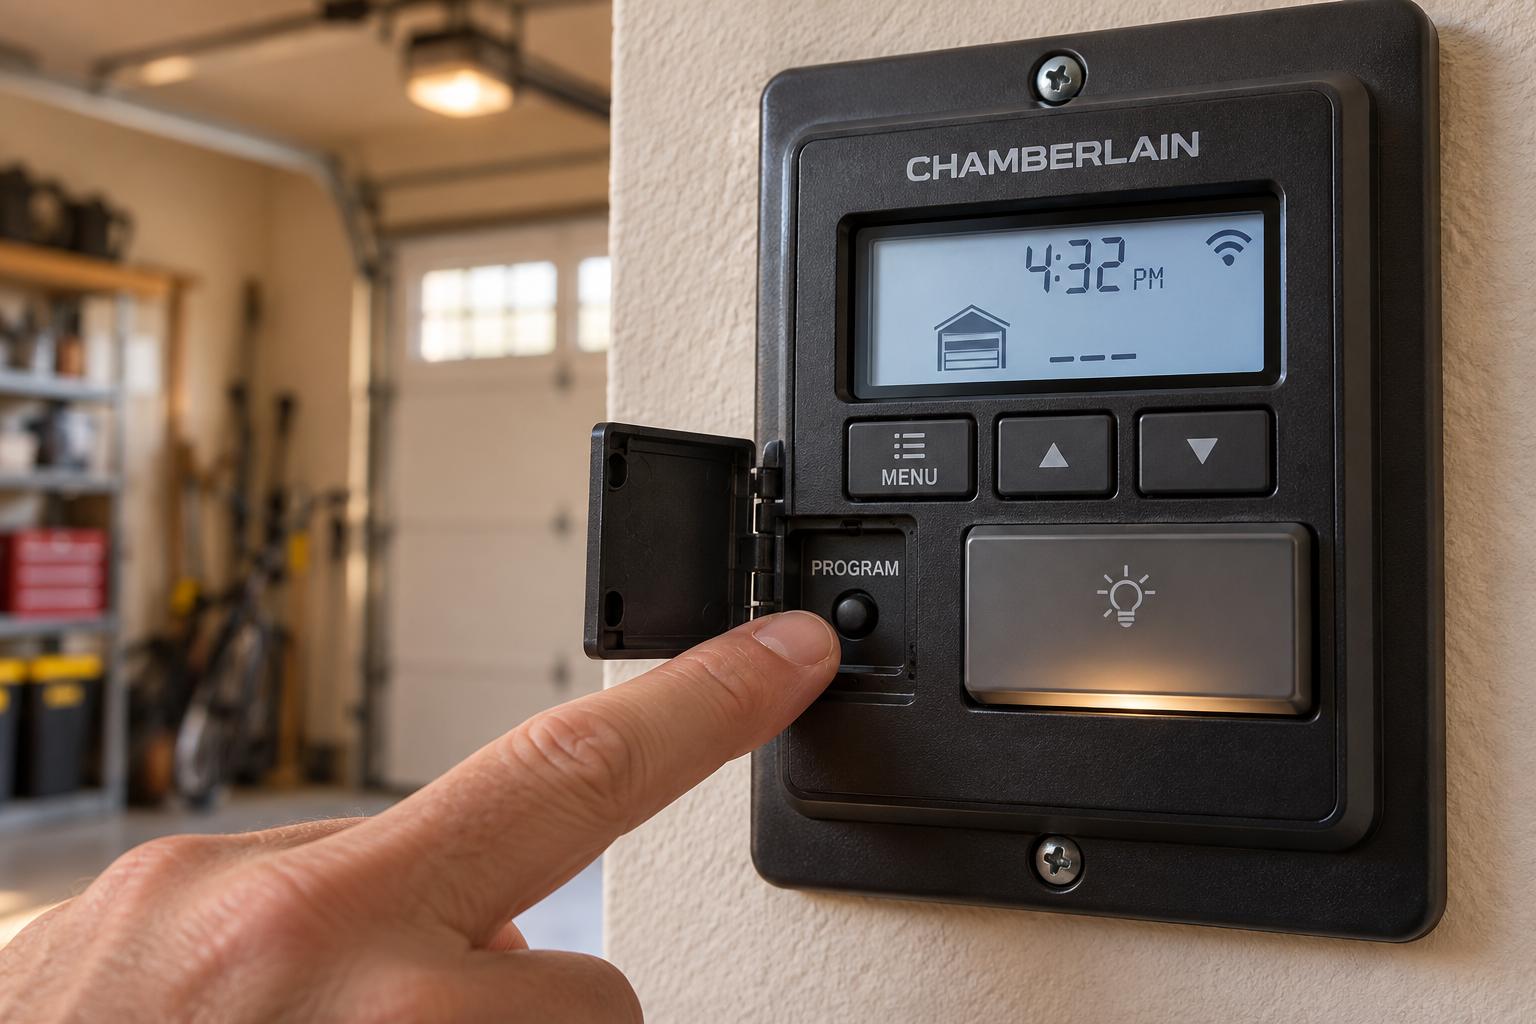
Many modern Chamberlain systems let you program remotes directly from the wall control panel inside your garage, which means you can skip the ladder entirely. This saves time. The wall station puts the motor unit into its pairing mode through the console’s menu or a dedicated program button, so the process is functionally the same as pressing the Learn button on the motor housing: you are just starting it from a more convenient location.
The specific wall control models that support this feature vary across the Chamberlain product line. If your wall station has an LCD screen or a multi-function push-bar interface, it almost certainly supports direct remote programming. Units with a single push-bar and no display typically do not have this capability, so you will need to use the motor unit’s Learn button instead. Either way, keep the garage door’s travel path clear before you begin, as the door may cycle as part of the confirmation step.
- Locate the Program Button: On your wall control panel, find the navigation or program button. Depending on your model, this may sit beneath the push-bar cover or be accessible through the LCD menu.
- Enter Programming Mode: Press the program button or navigate the menu to select “Program” and then “Remote.” The command light or screen will indicate the system is ready to receive a new signal.
- Press Your Remote Button: Press the button on your handheld remote that you want to program. Hold it until the opener responds.
- Confirm the Connection: The motor unit’s lights will flash, or the wall control will beep to confirm the remote has been successfully paired.
How to Set Up Your Chamberlain Wireless Keypad
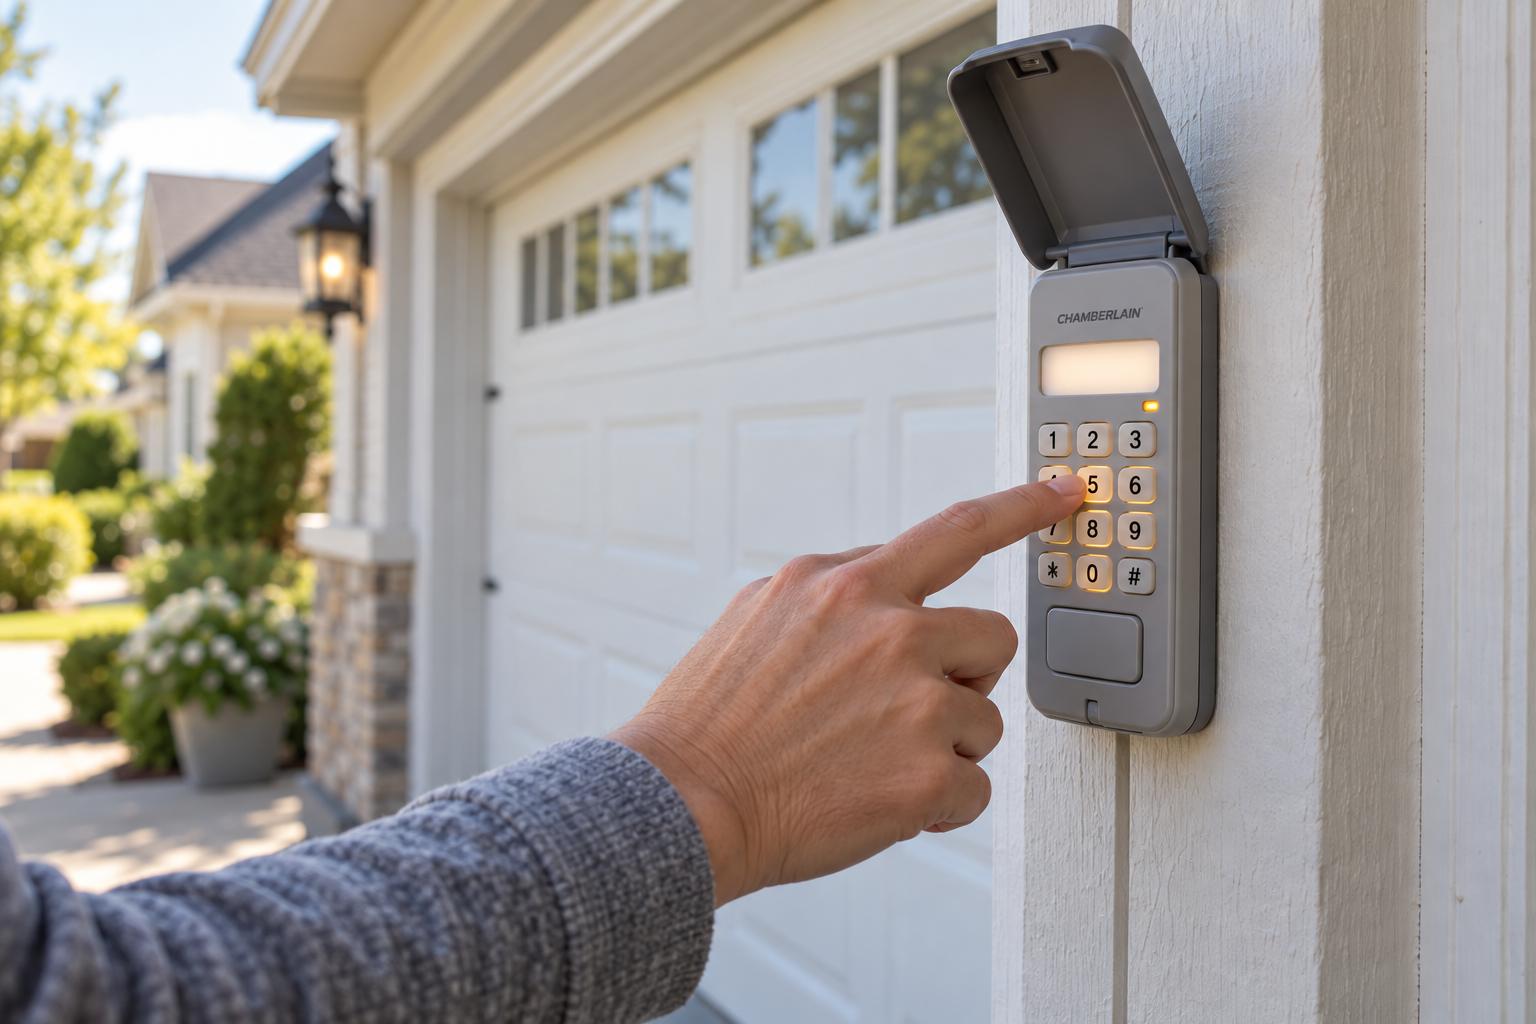
A wireless keypad mounted outside your garage door frame gives you secure, keyless entry using a personal identification number (PIN), which is useful when you need to let in a contractor, a family member without a remote, or anyone else who needs occasional access without handing over a physical device.
Setting up the keypad involves two linked actions: entering your desired PIN on the keypad and pressing the Learn button on the motor unit to sync the two devices. The general sequence requires you to enter your chosen PIN on the keypad, press the Enter button firmly and hold it, then press the Learn button on the motor unit within the pairing window. The motor unit’s lights will flash to confirm the connection. This means it worked. If your keypad model uses a slightly different sequence, the unit’s instruction sheet will specify it, but the core logic of entering a PIN and completing the pairing within the Learn button’s active window stays consistent across the product line.
Before purchasing a new keypad or replacement remote, it is worth verifying compatibility with your specific opener. If you would rather have a professional handle the setup and verification, our team is ready to help: you can easily program a Chamberlain garage door opener with our expert guidance, or have us manage the full installation and configuration for you.
How to Reset and Reprogram Your Chamberlain Opener
Clearing your opener’s memory is the right move any time you move into a home with an existing Chamberlain system, suspect that an old remote is still active, or find that your opener has reached its storage limit and refuses to accept new devices. The process wipes every programmed remote, keypad, and smart device in one step, so make sure you have all your current accessories on hand before you start, because you will need to reprogram each one from scratch.
- Clear the System Memory: Press and hold the colored Learn button on the motor unit for approximately 6 to 10 seconds. Release the button the moment the indicator light next to it turns off. That light going dark is your confirmation that the memory has been wiped. The system is clean.
- Verify the Wipe: Test your existing remotes to confirm they no longer operate the door. This step is especially important when moving into a home in Denton County, as you want to be certain no previous owner’s devices still have access.
- Reprogram Your Devices: Follow the standard remote and keypad programming steps covered above to pair only the devices you currently own and trust.
- Memory Capacity Limits: Standard Chamberlain residential openers can store a limited number of remote codes. If your opener was consistently refusing to accept new devices before you cleared it, that storage limit was likely the cause. Clearing the memory and re-pairing only the devices you actively use resolves this.
Homeowners in Denton County, including communities like Argyle, Corinth, Lantana, and Sanger, deal with an environmental variable that does not come up in most programming guides: extreme North Texas heat and humidity. Summer temperatures in this region accelerate the degradation of backup batteries and the sensitive receiver components inside the motor housing. What often looks like a programming failure or user error is actually a heat-worn receiver board that can no longer reliably store or read remote codes. If your opener holds a program for a few days and then loses it, or refuses to pair at all despite correct technique, the internal receiver may need professional diagnostic testing or replacement.
Frequently Asked Questions
Why won’t my Chamberlain remote connect to my garage door opener?
Dead or weak batteries in the remote are the first thing to check, and it is a surprisingly common cause that gets overlooked when people assume the issue is more complex. Beyond that, verify that your wall control panel is not in “Lock” mode, which disables all remote signals as a security feature. Local radio frequency interference from nearby devices can also disrupt the pairing process. And if your remote’s Learn button color does not match your opener’s, compatibility is the root issue regardless of technique. Practicing regular garage door maintenance tips helps you catch electrical and mechanical wear before it reaches the point of a full programming failure.
How do I reset a Chamberlain garage door remote?
Individual remotes do not have their own reset function: the memory lives in the motor unit, not the remote itself. To clear all stored codes, press and hold the Learn button on the motor housing for 6 to 10 seconds until the indicator light turns off. Once that wipe is complete, every remote and keypad that was previously paired will stop working, and you will need to reprogram each device you want to keep using.
How do I connect my Chamberlain remote to my garage door opener?
Find the colored Learn button on your motor housing, press and release it once, and then press and hold the button on your remote within 30 seconds. The opener’s lights will flash, or you will hear a click when the connection is confirmed. If the lights do not respond after two or three attempts, replace the remote battery and try again before assuming a hardware problem.
What should I do if my wireless keypad won’t program?
Start with the 9V battery inside the keypad, as a low battery is the most frequent cause of keypad pairing failures and the easiest fix. If a fresh battery does not resolve it, clear the opener’s memory entirely and run through the programming sequence again from the beginning. When you press the Enter button on the keypad during the pairing step, hold it down firmly until the motor unit lights blink. A partial press that does not register is enough to break the sequence.
Can extreme Texas weather affect my garage door opener’s programming?
Yes, and it is more common than most homeowners expect. Extreme summer heat in areas like Krum, Lake Dallas, and Copper Canyon puts sustained thermal stress on the electronics inside the motor unit. Over time, that heat causes the receiver board to degrade: it may start losing its memory intermittently, or stop accepting new pairings altogether. When that happens, troubleshooting techniques will not fix it. The receiver itself needs professional diagnostic testing or replacement.
Programming your Chamberlain garage door opener is a manageable DIY task when your hardware is in good working order, and your remote is compatible with your opener’s Learn button color. Most pairing failures trace back to dead batteries, a mismatched accessory, or the Lock mode being active on the wall panel, which are all quick fixes once you know where to look. When extreme heat, aging components, or a faulty receiver board enter the picture, the troubleshooting path gets murkier, and the risk of misdiagnosing the problem goes up.
For homeowners in Shady Shores, Lake Dallas, Krum, and Copper Canyon, Denton Overhead Door is your local partner for those situations. Our team provides rapid, same-day dispatch with honest rates and no hidden fees, offering a reliable alternative when DIY troubleshooting has run its course. Exploring our garage door services gives you a clear picture of everything we offer, from opener repair and replacement to full system installation, so your home stays secure and your garage door runs reliably year-round.
Here’s what Denton County homeowners say about working with our team:
“We just had our garage door opener replaced and Jeff did an outstanding job of installation and resolution to our situation. Thanks Denton Overhead Door & Garage Door Repair for your service! He was on time, professional and friendly and knowledgeable of his products and installation. Also, he helped with getting our Phone apps downloaded and installed. It was a pleasure to have him do the install. You will be pleased with their service! Ken” – Ken Chambers
“Caden was great and personable He did a great job and was very professional. I highly recommend him.” – Jack Taylor
“Came out the same day to assess the problem. Got the parts and came back out the next morning. Installed an entire new motor and 2 new pads and reprogrammed my car all in about 1hr. Cayden was very kind and cleaned up afterwards very well. We’ve used this company before and will continue to use them.” – Judy Gore
Stop struggling with a stubborn garage door opener. Our family-owned team brings 35+ years of experience to every job, and we’re available 24/7 throughout Denton County. Call Denton Overhead Door now at 940-260-3351 for same-day service, honest rates, and clear answers from start to finish.
Categorised in: Garage Door Openers